If you’ve ever struggled with a glass skylight that cracked in a hailstorm, a greenhouse cover that faded after one summer, or a patio roof that required a team of contractors to install—you’re not alone. Traditional building materials often force us to choose between durability, affordability, and ease of use. But polycarbonate sheets break that cycle: this thermoplastic powerhouse offers the strength of metal, the transparency of glass, and the lightness of acrylic—all in one adaptable material.
Yet, for many homeowners, contractors, and project managers, navigating the world of polycarbonate remains confusing. How do you avoid buying a sheet that’s too thin for your needs? What mistakes ruin even the best installation? And how do you keep polycarbonate looking and performing like new for decades? This guide answers those questions and more, focusing on practical, real-world advice to help you get the most out of your polycarbonate project—whether it’s a small backyard upgrade or a large commercial build.
1. Debunking Myths: What Polycarbonate Really Is (and Isn’t)
Before diving into applications, let’s clear up the most common misconceptions that lead to costly mistakes. Polycarbonate is often confused with acrylic or plastic sheeting—but it’s a entirely different material with unique properties:
Myth 1: “Polycarbonate is just ‘thick plastic’ and fades quickly.”
False. Unlike cheap plastic sheeting (which yellows and cracks in 1–2 years), high-quality polycarbonate is treated with a UV-resistant coating that blocks 99.9% of UVA/UVB rays. This coating isn’t just a “top layer”—it’s bonded to the material, ensuring it resists fading for 10–20 years. In independent tests, polycarbonate sheets exposed to direct sunlight 24/7 showed only 5% loss in light transmission after 15 years, compared to 30% for uncoated acrylic.
Myth 2: “Polycarbonate is too flexible—It can’t support weight.”
Partially true, but misleading. Thin polycarbonate (1–3mm) is flexible, which makes it great for curved projects like greenhouse arches. But thicker sheets (8–20mm solid polycarbonate) have a compressive strength of 12,000 psi—strong enough to support the weight of a adult when installed correctly. For example, 10mm solid polycarbonate is commonly used for machine guards in factories, where it must withstand accidental impacts from heavy tools.
Myth 3: “Polycarbonate is expensive—Cheaper to use glass.”
Not when you factor in long-term costs. A 4x8ft sheet of 6mm polycarbonate costs roughly \(50–\)70, while a glass sheet of the same size costs \(80–\)120. But the savings don’t stop there: polycarbonate’s light weight cuts installation labor costs by 20–30% (you can install most residential sheets alone, no heavy equipment needed). And since it rarely needs repairs or replacement, the total cost of ownership over 20 years is 40% lower than glass.
Myth 4: “Polycarbonate melts in high heat.”
False. Polycarbonate has a heat deflection temperature of 120℃ (248℉)—meaning it won’t warp or melt in direct sunlight (even in desert climates where summer temperatures hit 100℉+). It’s also flame-retardant: most polycarbonate sheets meet UL94 V-2 standards, meaning they self-extinguish within 10 seconds if exposed to fire. This makes it safe for indoor projects like office partitions or kitchen backsplashes.
2. The 5 Most Underrated Applications (And Why They Work)
Polycarbonate’s versatility means it’s useful for far more than just greenhouses and skylights. Here are the applications that professionals swear by—yet homeowners rarely consider:
1. Garage Door Windows: Safe, Shatterproof Security
Standard garage door glass is a major break-in risk: a single kick can shatter it, giving burglars easy access. Replacing it with 5mm solid polycarbonate solves that problem. Polycarbonate won’t shatter—even if hit with a crowbar—and it’s transparent enough to let in natural light. Best of all, it’s easy to cut to size with a circular saw, so you can retrofit existing garage doors in an afternoon.
Pro Tip: Choose “clear” polycarbonate for maximum light, or “tinted gray” for privacy (it blocks 30% of glare while still letting in light).
2. Basement Egress Windows: Light Without the Weight
Egress windows require a material that’s strong enough to withstand soil pressure but light enough to fit in tight spaces. Glass is too heavy (it often requires reinforcing the window frame), but 8mm corrugated polycarbonate is perfect: it weighs 1.2 lbs per square foot and resists bowing from soil. Plus, its ribbed design adds extra strength—so you don’t have to worry about it cracking if the ground shifts.
For homeowners in flood-prone areas, polycarbonate egress windows offer an added benefit: they float, making them easier to remove in an emergency (unlike glass, which sinks and can trap water).
3. Pet Enclosures: Durable and Pet-Friendly
Dog runs, chicken coops, and bird aviaries need materials that can withstand scratches, pecks, and the elements. Wire mesh rusts, glass shatters, and wood rots—but 3–5mm polycarbonate works for all of them. It’s scratch-resistant (even against large dog claws), waterproof, and easy to clean with soap and water. For chicken coops, polycarbonate’s transparency lets in sunlight (critical for egg production) while keeping out predators like raccoons.
4. Retail Displays: Bright and Long-Lasting
Store owners love polycarbonate for display cases and signage. Unlike glass, it won’t shatter if a customer bumps into it—reducing liability risks. And unlike acrylic, it doesn’t scratch easily (even with daily cleaning). For example, a jewelry store using 6mm solid polycarbonate display cases will see the material stay clear for years, even with constant handling. Polycarbonate also accepts vinyl decals and paint well, making it easy to brand displays with logos or colors.
5. Boat Covers and Marine Applications
Saltwater is brutal on building materials: it rusts metal, warps wood, and clouds glass. But marine-grade polycarbonate (treated with anti-corrosion additives) resists saltwater damage for 15+ years. It’s ideal for boat windshields, dock covers, and even small boat hulls (thin, flexible polycarbonate can be molded into curved shapes). Unlike glass windshields, polycarbonate won’t shatter if hit by a wave or floating debris—keeping boaters safe.
3. Installation Mistakes That Ruin Polycarbonate (And How to Avoid Them)
Even the best polycarbonate sheet will fail if installed incorrectly. Here are the top 5 mistakes to watch for—and how to fix them:
Mistake 1: Using the Wrong Fasteners
Many people use regular steel screws to install polycarbonate, but this is a disaster. Steel rusts, and the rust leaches into the polycarbonate, leaving unsightly stains. Worse, rust expands, cracking the sheet over time.
Fix: Use stainless steel or aluminum screws with wide, flat washers. The washers distribute pressure, preventing the screw from digging into the polycarbonate (which causes stress cracks). For corrugated polycarbonate, use “corrugated-specific” screws that fit into the ribs—this keeps the sheet from shifting in wind.
Mistake 2: Tightening Screws Too Much
Polycarbonate expands and contracts with temperature changes—up to 0.6 inches per 10ft sheet in extreme heat. If you tighten screws all the way down (so the sheet can’t move), it will warp or crack as it expands.
Fix: Leave a 1/8-inch gap between the washer and the sheet. Think of it as “snug, not tight”—you want the sheet to be secure, but still able to slide slightly in the fastener hole.
Mistake 3: Installing Polycarbonate Flat (Without Slope)
Water pooling on polycarbonate is one of the biggest causes of damage. Even a small puddle can add weight (1 gallon of water weighs 8.3 lbs) and, over time, seep into seams—causing mold or rotting the support structure.
Fix: Always install polycarbonate with a slope of at least 1:12 (1 inch of drop for every 12 inches of length). For example, a 10ft-long patio roof should drop at least 10 inches from one end to the other. For flat projects like skylights, add a “cricket” (a small triangular slope) to direct water away from seams.
Mistake 4: Cutting Polycarbonate with a Dull Blade
A dull circular saw blade tears polycarbonate instead of cutting it, leaving rough edges that catch dirt and moisture. These rough edges also reduce the sheet’s strength—making it more likely to crack at the cut line.
Fix: Use a fine-tooth circular saw blade (100+ teeth) or a jigsaw with a bi-metal blade. Always cut polycarbonate face-up (with the UV-coated side up) to avoid scratching the coating. For clean cuts, clamp the sheet to a workbench and move the saw slowly—fast cuts generate heat, which can melt the edges.
Mistake 5: Ignoring Seams and Edges
Unsealed seams let in water, dust, and insects—ruining the insulation of greenhouses or skylights. Similarly, exposed cut edges can absorb moisture, leading to discoloration.
Fix: Use polycarbonate-compatible sealant (silicone or butyl tape) on all seams. For cut edges, cover them with “edge caps” (available at home improvement stores) or paint them with a UV-resistant acrylic paint. This simple step adds 5–10 years to the life of your polycarbonate.
4. Maintenance 101: Keeping Polycarbonate Looking New
Polycarbonate is low-maintenance—but it’s not “no-maintenance.” Follow these steps to ensure your sheets last 20+ years:
Step 1: Clean Polycarbonate the Right Way (Avoid Abrasives!)
Never use steel wool, scouring pads, or harsh cleaners (like ammonia or bleach) on polycarbonate—these scratch the UV coating, leading to premature fading. Instead, use a soft sponge or microfiber cloth with a mild soap (like dish soap) and lukewarm water. For tough stains (like bird droppings), let the soap sit for 5 minutes before wiping—don’t scrub.
Step 2: Inspect Seals Annually
Every spring, check the sealant around seams and edges. If you see cracks or gaps, remove the old sealant with a plastic scraper (metal scrapers scratch polycarbonate) and reapply fresh sealant. This prevents water from seeping in during summer rains or winter snow.
Step 3: Remove Debris Promptly
Leaves, pine needles, and dirt that pile up on polycarbonate can block sunlight and trap moisture. For roofs or high-up surfaces, use a soft-bristle broom or a leaf blower on the lowest setting (high settings can scratch the coating). For greenhouses, wipe the inside of the sheets once a month to remove condensation buildup (which can lead to mold).
Step 4: Repair Small Cracks Early
Even with proper care, small cracks can happen (e.g., from a falling branch). Ignore them, and they’ll grow—so fix them within a week. For cracks less than 1 inch long, use a polycarbonate repair kit (available online or at hardware stores): clean the area, apply the repair resin, and let it dry for 24 hours. For longer cracks, cut a small piece of polycarbonate (slightly larger than the crack) and glue it over the area with polycarbonate adhesive—this acts as a “patch” to stop the crack from spreading.
5. Choosing the Right Polycarbonate Sheet: A Step-by-Step Guide
With so many options (solid, corrugated, multiwall, textured), choosing the right sheet feels overwhelming. But it boils down to three simple questions:
Step 1: “What will the sheet be used for?”
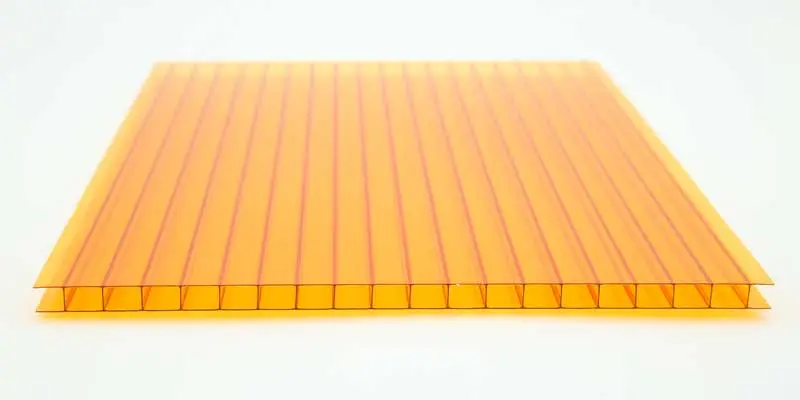
- Roofs (patio, shed, greenhouse): Corrugated or multiwall polycarbonate (lightweight, easy to install, and drains water well).
- Security (machine guards, garage windows): Solid polycarbonate (8–12mm thickness for maximum strength).
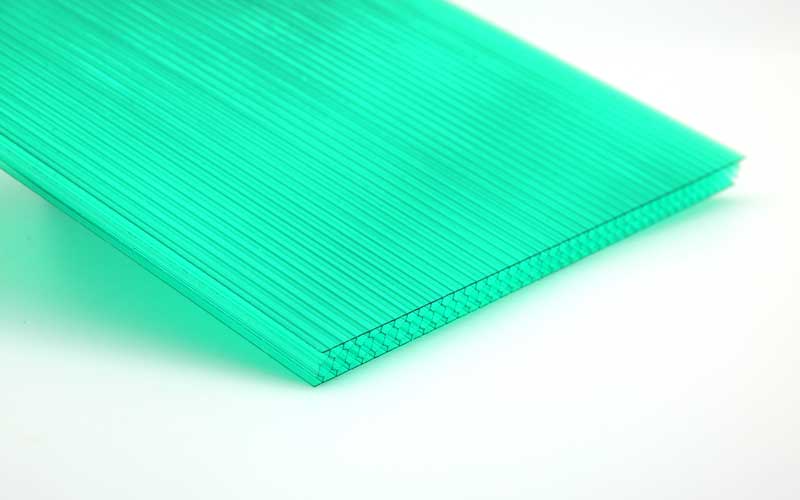
- Insulation (skylights, conservatories): Multiwall polycarbonate (twin-wall for mild climates, triple-wall for cold climates).
- Privacy (shower walls, partitions): Textured polycarbonate (frosted or ribbed to block visibility while letting in light).
Step 2: “What’s the climate like?”
- Hot, sunny areas: Choose polycarbonate with an IR-blocking coating (reduces heat absorption by 30%, keeping spaces cooler).
- Cold climates: Triple-wall multiwall polycarbonate (R-value 3.0, compared to 1.5 for twin-wall) to retain heat.
- Coastal areas: Marine-grade polycarbonate (resists saltwater corrosion—look for “UV+anti-corrosion” labeling).
Step 3: “What’s my budget?”
Polycarbonate ranges in price from \(1.50 per square foot (thin corrugated) to \)8 per square foot (thick solid polycarbonate). But remember: spending a little more upfront saves money later. For example, a \(200 triple-wall polycarbonate greenhouse cover will last 20 years and reduce heating costs, while a \)50 cheap plastic cover will need replacing every 2 years—costing $500 over the same period.
Final Thought: Polycarbonate Isn’t Just a Material—It’s a Solution
At its core, polycarbonate isn’t just another building material—it’s a way to solve the problems that have frustrated project owners for decades. It lets you build a greenhouse that survives hailstorms, a patio roof you can install yourself, and a garage window that keeps your home safe. It’s durable without being heavy, affordable without being cheap, and versatile without compromising on performance.
The key to success with polycarbonate is simple: avoid the myths, skip the common mistakes, and choose the right sheet for your project. With that approach, your polycarbonate project won’t just meet your expectations—it will exceed them, lasting for decades with minimal effort.